Wednesday, September 30, 2009

Enchiladas!

I just made some enchiladas using The Pioneer Woman's recipe.
Review:
PRO:--They're REALLY good! I'm not an enchilada person normally and these are good!
--the recipe is simple and super easy, Easy, EASY to follow

CON:
They're a bit time consuming...mainly the sauce (I'll address some short cuts at the end)

Adjustments:
--Changed meat to 1/2 chicken, 1/2 ground beef. (browned 1 lb of ground beef but set aside 1/2 lb for sloppy joe's this weekend); the chicken was leftover from extra cooked for chicken turnovers
--added green peppers (1/2 c frozen, chopped), chopped mushrooms about 3 oz (again left over from chicken turnovers), oregano (1 tsp), chili powder (1-2 tsp), black pepper (1/4 tsp)
-used frozen chopped onions, about 1.25c
--For the sauce I used Las Palmas mild, red enchilada sauce (found in the mexican food area of Kroger)
--I added the remaining can of cream of chicken (from the turnovers, about 3/4 of the can). Not necessary but it worked.
--I used 1/2 sharp cheddar cheese, 1/2 pepperjack cheese shredded.
--I used baked flour tortillas (I don't like the texture of corn or the thought of frying them)...just baked them in the oven on 350F for about 3-5 min, til they're soft but not crunchy, crunchy

Final Results: I was able to put 6.5 enchiladas in each 8x8 pan. That will be one pan for dinner tomorrow (probably 2 nights of dinner really), 1 for the freezer!

Time saver Ideas:
-use canned/rotisserie chicken in place of ground beef (although I liked the combo of both)
-use frozen, chopped onion, green pepper
-bake tortillas & prepare meat mixture while sauce is cooking
-Everything else is pretty much canned, the only thing you have to do in terms of prep is shred pepperjack cheese, chop green onions and cilantro.

The assembly line:

ABOVE: from far right: sauce pan, tortilla dipping area, meat, olives, cheese, green onions, prepared pan; tortillas dipped

ABOVE: meat mixture combo of ground beef and chicken; cheese mixture and chopped olives

Final product, ready to roll up and set in pan seam-side down...cover with more sauce, cheese, BAKE and Enjoy!!

Tuesday, September 29, 2009

Chicken Turnovers

I found this recipe in some "Summer Light" magazine or something and decided to try it out. Senor really liked them, rated them above spinach roll-ups which he enjoys a good bit. They're kind of like little chicken potpies but somehow very different too. They're easy to toss together and we had enough for 2+ nights. I used the leftover filling mix in some phyllo tart cups. Served with canteloupe, watermelon, granny smith apple, and banana salad.
I'm thinking you could save alot of time on this one by using either canned or rotisserie chicken and chopping it up, as well as frozen celery/onion mix. If you did both of those this would be a SUPER fast meal.
Chicken Turnovers: (adapted from "Light & Tasty" April/May 2006-pg 59)
1 c cooked chicken breast, chopped
1 c (4 oz) sharp cheddar cheese (it calls for light, I don't do light cheese--use your own judgement)
1/4 c celery, chopped (I used probably more like 1/3 c)
1 Tbsp onion, finely chopped (again, used more)
1/4 tsp salt (used less)
1/4 tsp black pepper
1 tube (8 rolls) low-fat crescent rolls (they're actually not too bad)

Added in:
2 oz canned mushrooms drained well and chopped
1 Tbsp dried parsley flakes
1-2 Tbsp low-fat, low sodium cream of chicken soup
6-8 shredded baby carrots

The recipe calls for mixing all the stuff together (except the rolls) and then spooning it into the rolls, baking. I would recommend (if you have the time) sautee-ing the onions, celery and mushrooms. They were quite strong and still crunchy for ours which was fine, but I think I'd prefer them cooked a bit more.
1. Preheat oven to 375F. Line a baking sheet with foil.
2. In large mixing bowl combine chicken, cheese, celery, onion, salt, pepper (mushrooms, cream of chicken soup)...

3. Roll out the crescent rolls (separated) on the cookie sheet; spoon 1-2 Tbsp of mixture onto each roll and fold over, pressing edges together (mine didn't look very pretty)...

4. Bake at 375F for 15-18 min or until golden brown. OR spoon a teaspoon of mixture into little phyllo tart cups (Walmart has them for cheap FYI) and bake for maybe 10-13 min...would be good for little grubby hands!


This made 8 rolls plus about 10 tart cups. We each ate 2 a night plus fruit (senor had other leftovers as well)...I would say it'd be a safe 1 night meal for a small family of 4.

For previews of tomorrow's dinner you can go check out this recipe...PS Publix has asparagus on sale thru today!

Monday, September 28, 2009

Spinach Lasagna Roll-ups

It has come to my attention that there are actually people who read this and some of you are actually trying to do the whole monthly-calendar meal planning thing--see bottom of blog! I say props to you! It seems like a huge pain in the um, rump, at first but in the long-run it makes life much, much, much easier. I could give you the whole history of how that came to be for me, but I'll spare you.
In that same vein, it has come to my attention that some of you are looking for easy, quick, healthy meals and don't have all hours of the day to create some elaborate, labor-intensive crazy meals!! REALLY?! I'm only kidding. I used to be a working girl too. SO...I'm going to try and post everything we prepare for dinner here. Even if it's not fancy/pretty. Because, believe it or not, sometimes we do have easy, simple dinners. I just never posted b/c they didn't seem blog-worthy. Now I stand corrected.
Last night we had these Spinach Lasagna Roll-ups. I don't recall where the recipe came from but they're one of Senor's favorite things. At the end I'll give you a few short-cut options as well as $$ saving options. They're pretty straight-forward. I made a dozen, we ate 3 and froze 8 more for later.
1. Step 1 Brown your Italian sausage (1 pack) or 1 lb ground beef; also put on a large boiler of water with a little EVOO+ salt (for your noodles)


2. While that's cooking, beat cottage cheese until it's like softened cream cheese...(still kind of lumpy); add egg and beat on high for 3 min.


3. Throw beaters in the wash. Stir in seasonings (I used maybe 1-2 tsp basil, 1 tsp oregano and 2-3 tsp parsley, 1/4-1/2 tsp black pepper??); then finely chop 1/2 onion, 2-3 cups fresh spinach; drain/blot with paper towel (the onions) REALLY WELL!


4. Now your sausage should be done, 12-14 noodles cookin per package instructions (usually 7-8 min in boiling water); when they're done, drain, rinse in cold water, rinse again and let them sit in cold water. Drain sausage/beef and blot it really, really well for extra grease out. Toss onions, spinach, 1.5 c Italian cheese mix, and HALF the beef into the cottage cheese mix. Stir well. It should be kind of like mashed potato consistency.


5. Now get out your loaf pan(s) (I use disposable foil pans -3pk)...spoon 2-3 big tablespoons of tomato sauce in the bottom, spread evenly. Then on a cutting board, lay out 3-4 noodles, blot them dry.


6. If you want to cook some, go ahead and preheat the oven now to 375F. Spoon 2-3 teaspoonfuls of the cheese mix onto each noodle, smear out evenly (keep it towards the middle of the noodle cuz it will squish out as you roll)...then roll it up, placing it in the prepared pans, seam side down.


7. You can usually fit 4 in a loaf pan if you squish them a little. Now, when done, top with a few tablespoons of tomato sauce and sprinkle with remaining Italian cheese. If you want to eat them...cook at 375F for 20-30 min til bubbling and cheese has melted. Otherwise, wrap in plastic wrap, then foil, label and freeze til you're ready to cook them!


OK...now for short-cuts if you want to save time:
1. Use Ricotta cheese instead of making the cottage cheese mix. All you have to do then is mix in your spinach, onion, meat and Italian cheese. No beating, no egg, no seasoning (unless you want to)
2. You could use frozen, chopped onion (thawed, drained) and frozen chopped spinach (thawed and drained)
3. You could also layer the noodles and ingredients in the loaf pan instead of rolling each one, making more of a lasagna type thing; OR use the big pasta shells and make stuffed shells.

For $$ saving tips: (not much to add here)
the biggest thing is ricotta cheese is expensive so that's why I do the whole cottage cheese deal.

You can use chicken, beef or sausage...whatever's on sale

Optional add-ins:
I usually use canned mushrooms (drained and chopped), some feta cheese mixed in and some grated parmesan mixed in as well. Senor likes extra (fresh) mozarella mixed in...you could probably do zucchini, etc. You choose.

For serving size I usually eat one roll-up, senor eats 2. Then there's one leftover for lunch the next day...

Thursday, September 24, 2009

Quick, Easy Stuffed Peppers

Last week we had a very simple meal I forgot to post about, mainly b/c I didn't have a photo for you. GASP! I know. BUT Martha and MaryAnn both do, so you can look at theirs. I didn't follow either recipe, just used the photos to inspire me.
The basic concept is black beans, rice, some seasonings-mix, stuff, bake. Done.

I opted for the easy way out and used my usual beans n rice option:
I cooked per the directions on the box, then in addition I mix in:
1 14 oz can corn, drained
1 14 oz can diced tomatoes, drained well
1 14 oz can black beans, rinsed and drained
1 14oz can pinto beans, rinsed and drained
1 c shredded pepper-jack cheese (I did this to make it more cohesive for the stuffing, but I don't normally if we're using this mixture for nachos or burritos or something)

Stuffed it into the peppers, placed in a foil-lined loaf pan, topped with shredded pepper-jack cheese. Baked at 375F til they were done. The only thing I might have changed was to add some lean ground beef (cooked of course) for senor. He as a little sad looking eating his extremely vegetarian-friendly meal. I also think I'd cover the peppers for a while (without the cheese) and cook so the peppers were more tender, then remove the foil and top with cheese, con't baking.
Either way, super easy. Quick and allows for leftover beans n' rice nachos on day 2 (if you're only making 2 peppers like us).

Wednesday, September 23, 2009

I think my life is complete...


I LOVED (no seriously, L.O.V.E.D.) Twinkies as a kid. Hard to believe I know. I gave them up several years ago (somewhere around freshman year of college) for health conscious reasons. I used to pack a whole box for summer camp. True story--ask my bestie Linds. She'll atest to my love of Twinkies. (and cheese balls and white bread with butter...my how things have changed!)

I clicked over to Baker's Banter to see what they'd updated and lo, and behold...a recipe for homemade Twinkies.

I was just telling Senor Sunday I was CRAVING Twinkies and Oreos, but I REFUSED to give in to the junk food crave...BUT NOW!!!!! I don't have to, I can have my Twinkie and eat it too!!! You better believe I'll be trying this out, I'll be sure to let you know how it goes. Ah, Twinkies!

Summer Sandwiches and Fruit Parfaits w/Granola

We used the left over turkey for Summer Sandwiches last night. I also had a serious craving for oatmeal with cinnamon/sugar flavor so I tried my hand at homemade granola--sort of.

I then decided to throw the "granola" into some glasses with some plain yogurt and whipped cream, some fruit. Voila! Perfect dessert!

Senor gave the meal 2 thumbs up and a pat on the belly (his, not mine) which is to say "que bueno".

Summer Sandwiches:
Preheat oven to 350F, line a cookie sheet with foil. Toast bread if desired first. Then...

Lay out 2 pieces of pumpernickel rye bread (I found this from Pepperidge Farms at Publix)

slather one side of sandwich with Zaxby's sauce (or thousand island dressing, Russian dressing, etc)

Add desired amt of turkey over sauce (I would recommend using oven roasted turkey from the deli if you don't happen to have leftover roasted turkey, I mean, I know most of us usually do, but just in case...)

Top turkey with THINLY sliced granny smith apples, yum! Are you feelin' the summer love yet?

Then add on MORE love with sliced Brie (or in this case Butterkase cheese--our cheese dept at Kroger is lame)

Bake in the oven for about 10 min, or until cheese is bubbly and melted. Remove from oven, top with thinly chopped spinach. Serve open faced.

GRANOLA:
This is what I did, adjust it to your liking. I think it's pretty tasty personally. Can't keep my hand out of the leftovers! And tossed it on a smoothie this morning...MMmmmmmm.

3/4 c coarsely chopped nuts (I used 1/2 c pecans, 1/4 almonds--just random)
1 c old-fashioned oats
1 tsp cinnamon
1/4 tsp nutmeg
2 Tbsp brown sugar
3 Tbsp butter
1/2 tsp vanilla
1 Tbsp honey
1/4-1/2 c sugar
Optional add-ins: craisins, raisins, coconut shredded

1. In a large mixing bowl mix together nuts, oats, cinnamon and nutmeg.
2. In large non-stick skillet heat and metl butter over med hi. Add in vanilla, sugars and honey. Stir to mix. Allow sugar to begin to melt and bubble. When it begins to bubble stir in oats mixture, con't stirring for 1-2 min or until it begins to look crumbly and stick together.
3. Remove from heat, spread out on an aluminum-lined cookie sheet (sprayed) and allow to cool. Break into pieces. Keep refrigerated--it will last for a few weeks.

For Parfaits:

I layered granola, whipped cream, banana, plain yogurt, granola, blackberries, plain yogurt, granola, mangoes, whipped cream and granola...But you can do whatever your heart's desire! It will taste lovely and light on a late-Indian summer evening!

Tuesday, September 22, 2009

Turkey, Potatoes and Brocoli

Sounds really original huh?! I was strumming through my "Best of Martha Stewart 2002" cookbook last month and came across several different cultural versions of Thanksgiving meals. The "spice-cured turkey" (pg 253) called to me. Then I flipped over to another month and saw "Potato Gratin" (pg 233) and it called to me. Of course, Martha pays her food photographers quite well for stuff to call to me, right? So I decided then and there we'd have those 2 things one day this month. Yesterday was that day. A very long day. The turkey (which I unfortunately do NOT have a final photo of) was quite good. This was after a VERY trying time of cooking it...I almost lost my religion over the stupid fowl. But not quite. The potato gratin sounded fancy but surprisingly was kind of eh, so-so. I also served steamed broccoli with shallots and walnuts. One of my fav ways to make broccoli.

The turkey seemed daunting at first run through the recipe, but in reality it's pretty easy; just time consuming. I think if we were to host Thanksgiving at our house I'd use it and start a day or 2 ahead. For this one I used a cute little 3 lb Butterball turkey breast (found in the frozen meat section)...didn't feel the need to stick with Martha and her 15-18lb birds. I thawed the turkey (in its original packaging in a sink of cold water for about 3-4 hours til it was thawed more or less).
(the brine)
The Turkey: (per my adjustments--which were quite liberal)-Step 1
Brine (or a broth of sorts you make and soak the bird in for several hours, preferrably overnight)
3/4 c coarse salt
1 c sugar
1 tsp celery seed
1/2-3/4 c chopped frozen onion
2 bay leaves
1 bulb of garlic cut in half, length-wise
2 tsp black pepper
1 1/2 tsp cumin
1/2-3/4 tsp red pepper
1/2 tsp cloves
3/4 tsp allspice
4 c water
Mix all together in a boiler and bring to a boil; remove from heat, allow to cool completely.
When it's cool place turkey in a bowl/dish; pour brine over it and add enough water (if needed) so it covers the whole bird and cover, refrigerate overnight.
Turkey Step 2:
Preheat oven to 425F.
Mix together the following:
(SPICE BUTTER)
1/2 stick butter
1/4 tsp salt
1/4 tsp black pepper
1/4 tsp thyme
1/4 tsp cumin
1/4 tsp garlic powder
1/4 tsp red pepper
1/8 tsp allspice
1/8 tsp cloves
1/8 tsp nutmeg
Mix together well, set aside.

Now, place your turkey in a roasting pan. Pour a small amt of the brine in the bottom of the dish (maybe like 1 c)...you can pour the rest out or hold onto it for basting. Use 1/3 of the butter mixture and rub the top of the turkey down. Place in the oven. After 30 min, turn the heat down to 350F; recoat with 1/2 remaining butter and little brine. Con't basting every 30 min. When the turkey gets golden brown & crispy cover with foil and con't baking until an inserted meat thermometer reads 180F. (Ours took a little over 3 hours to cook).

Potato Gratin:
1 Tbsp butter
1.5 tsp EVOO
1 yellow onion, sliced
1/2 tsp sugar
4 small baking potatoes, peeled and sliced (1/8")
salt and pepper, to taste
4.5 oz Reblochon cheese (I used Camabert), coarsely chopped
2 tsp dried thyme
**Preheat oven to 325F (I baked it at 350F b/c of the turkey also sharing the oven)
1. In med skillet over med-hi heat melt butter and heat oil. Add onions. Sprinkle with sugar. Sautee until onions are golden and soft.
2. In a casserole dish (I used a 10" round Corningware dish)--well greased--layer 1/3 potatoes. sprinkle with salt and pepper, 1/3 of the thyme, half cheese and half the onions.
3. Layer another 1/3 of potatoes. Sprinkle with salt, pepper, 1/3 of the thyme, remaining cheese and remaining onions.
4. Now add the final layer of potatoes, sprinkle with salt/pepper and remaining thyme.
Cover with aluminum foil and bake 25 min, remove foil and con't baking for 20-30 more min or until its goldening on top.

Broccoli: (adjust amts as needed)
Broccoli-fresh, coarsely chopped
walnuts, coarsely chopped
shallots, thinly sliced
salt/pepper
EVOO

In a med skillet over med-hi heat, heat EVOO. Sautee shallots til soft and goldening. Add broccoli and 1/2 c water, simmer uncovered til water is absorbed (add more water if softness of broccoli is not achieved). Toss in walnuts and little butter/EVOO and stir til they're warm. salt/pepper to taste.


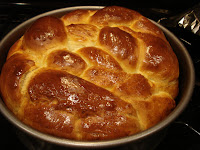
Challah


Go ahead, get it out of your system, "I Ain't no Holla' (or Challah) Back Girl". Ok, I'm sorry in advance if that was offensive to anyone but it's been in my head for 2 days no. Dang Gwen Stefani and her catchy lyrics.
Ok, now for the story of why me (Ms. Non-Jewish chick) is making Challah bread. I was at the store last week and saw some (I guess in preparation for Rosh Hashana?) and it made me think of french toast. French toast?! Yes, you know when restaurants serve GOOD french toast it's often made with challah bread?! Well, if you didn't you should check it out. Once you've had it that way french toast will never be the same. Same holds true if you've had french toast made with homemade cinnamon swirl raisin bread.
ANYWAYS, so being the nesting-weird-craving-preggo that I am, I decided I would attempt Challah bread (I liked the idea of the challenge) and would use a portion of it (stale of course) later in the week for french toast.

I scoured several websites and found 3 recipes that seemed like good potentials. I looked here, here, and here. I decided to use mostly Smitten Kitchen's recipe--PS (check out her site for the cutest little cinnamon swirl head of hair ever) and use Baker's Banter method. Heidi's seemed overwhelming and complex. I cut the portions down because, well, I didn't want that much Challah.

I started out making the dough yesterday morning with the intent to leave it "overnight" in the fridge, but then I got anxious last night and decided 7.5 hrs in the fridge through the day was just fine.
Here's the recipe:
2 1/4 tsp dry active yeast (I only use Fleischman's)
1 1/2 tsp sugar + 1/4 c sugar (divided)
2 Tbsp melted butter
2 Tbsp EVOO
3 eggs
1 1/2 tsp salt
4-4 1/4 c All-purpose flour
7/8 c luke water (or measure out 1 c then remove 2 Tbsp same thing!)

1. Dissolve yeast, 1.5 tsp sugar and water in bowl.
2. Whisk in butter, oil. Whisk in TWO of the eggs (one at a time). Then gradually stir in the remaining sugar (1/4 c) and salt.
3. Gradually add flour. When the dough holds together its ready for kneading. Turn it out onto a floured surface and knead (lightly flour hands and keep flouring the surface/dough as needed) until it is smooth and soft.
4. Place in a well greased bowl, cover tightly with plastic wrap and place in the fridge for 7-8 hours (or overnight).
5. Remove and allow to come to room temp (usually about 1 hour or so).
6. When room temp, punch down and let it sit for 30-45 min.
7. Now form it into 1 loaf, OR if you wanna be all fancy pants and braid it make 3-6 balls of dough. Roll each into sticks about 14" long and 1/2" diameter. (lightly flour as needed). Then lay them out parallel and pinch the ends together, then braid. I tried the 6 strand thing and it didn't go so well.
I would strongly recommend just doing a regular 3 strand braid for your first go.
8. When done braiding, pinch the ends together and spray spring form pan or cookie sheet. (depending on if you want a round or loaf)--loaf is the easiest. If using the spring form pan, place dough along the outside edge and bring together and pinch to form the ring.
9. Use the remaining egg, whisk it well and brush the top of the loaf with egg. Cover with flour sack and allow to rise for 1 hour.
10. heat oven to 375F, brush top of loaf once again with egg. Bake for 30-45min (Mine was done in about 28 min) or when golden brown, hollow-sounding when thumped, and/or inserted thermometer registers 160F.

Remove, allow to cool for a few, then cut it up and eat it while it's warm. Save some to use for french toast later in the week!

Monday, September 21, 2009

Chocolate Chip Cookies


What better way to enjoy a dreary day than by baking some yummy classic, comforting chocolate chip cookies?! I know, they're like chili, hamburgers, and other classics...everyone has their recipes they swear by, so what's new right?! Well, in either case I thought I'd share mine with you. It's easy. I've never had it fail on me--taste or presentation-wise.
Now, where did I find it?! MANY years ago there was that whole "Million $ Neiman Marcus Cookie" recipe email going around...yeah like going on over 10 years ago. Well, I knew it was a total bowl of crack BUT the recipe sounded decent enough so I tried it and the cookies were far superior to previous chocolate chip cookies I'd made so I kept it and have been using it ever since. Don't be turned off by the oatmeal either, you DO NOT NOTICE IT. Cross my heart.
I strongly recommend for the best cookie using semi-sweet or dark chocolate chips, milk chocolate shavings, white chocolate chips AND some chopped, toasted pecans. Yes, all of them. In one bowl. One cookie.
On to the recipe:
3 3/4 c APF
2 tsp baking soda
1 tsp salt
1 c oats (I use whatever plain oats I have in the cabinet, quick cooking or regular, doesn't seem to matter that much)
3 sticks of butter--yes THREE...don't give up now!
1 c granulated sugar
1 1/4 c packed brown sugar
2 eggs
1 Tbsp vanilla
6 oz semi sweet chocolate chips (or 60% cocoa)
6 oz white chocolate chips
2 4-oz milk chocolate bars chopped up
1-2 c chopped pecans (or walnuts), toasted, cooled

1. Preheat oven 350F
2. In med mixing bowl combine flour, baking soda, salt, oats (if you wanna get daring toss in some cinnamon, like 1-2 tsp) now
3. In LARGE mixing bowl and with strong electric mixer (or lovely Kitchenaid) mix together butter, both sugars til creamy. Add eggs one at a time, mixing well after each. Add vanilla and scrape sides/bottom of bowl well; mix on high til blended and smooth.
4. Gradually add in flour mixture, it will get very thick!
5. With wood spoon (with a thick handle, I've broken one before doing this) or with a good spatula, stir in your "mixins"--chocolate, chocolate and more chocolate.
6. Spoon out 1 tsp of dough, roll into ball and place on parchment paper-lined cookie sheet (or ungreased aluminum foil works too). 12 for a regular size pan, 16 for a big pan. Bake 10-12 min or until edges are just turning brown. Remove from oven, allow to cool for 5 min then move to a cooling rack.
** You can also freeze these (as I did most of it this morning) and roll dough into balls, place on GREASED cookie sheet (aluminum lined, and sprayed is perfect) place as many as you can without crunching them. Set in the freezer 20-30 min til they're frozen and transfer to a freezer ziplock bag. When you're ready to eat, heat up the oven to 350F, place desired amt on cookie sheet, and bake for 12-15 min (or you can allow the dough to thaw a bit and then bake 8-12 min).
The recipe makes a bazillion cookies. Usually in the 5-6 dozen ballpark, depending on how big you make them.

Pot Stickers and Sticky Rice

I spent a few weeks in Thailand several years ago whilst my brother and sis-in-law were doing a study-abroad. It was such an amazing experience. There were several dishes I absolutely fell in love with and ended up practically living off of for the time I was there. 1)Rottis. Which I'll have to try and post at some point. I've attempted them once and it worked out okay. 2) banana shakes (which I've discussed previously on here) and 3) Mangoes and Sticky Rice.
Last night I decided we'd try some pot stickers and have mangoes and sticky rice as the "Side/dessert".
I had bought and boiled a VERY large pack of chicken (with bone/skin) Saturday evening in preparation for making several more freezer meals; not realizing the recipe for the pot stickers called for ground meat. So we finely chopped the chicken. No biggie.
NOW, I will forewarn you, these little bites of goodness were kind of labor-intensive. Worth it in deliciousness and would work well if you could make a HUGE batch (like triple the recipe) and freeze the rest for later (which we did)...but they're not for the faint of heart or those crunched for time...they were pefect for a rainy, lazy Sunday evening. It took some effort.
Here are my versions of both recipes:
POT STICKERS--
30-45 wonton wrappers (I found them in the produce section of Kroger, small square ones)
4 c green cabbage, shredded
2-3 carrots, shredded
1/2 c water
1.5-2 c chicken, cooked, finely, FINELY chopped-almost ground meat like
1 c green onions, finely chopped
1.25 tsp ground ginger
1 tsp salt
2 tsp sesame oil (do not substitute)
2 egg whites (or 3)
2-3 cloves garlic, minced
2 tsp cornstarch
4-6 tsp oil (veggie is fine)
1 c water

Chop cabbage, carrots; mix together. In a separate bowl mix together chicken, green onions, ginger, salt, sesame oil, egg whites, garlic.
In a large non-stick skillet heat 2-3 tsp oil over med-hi heat. Add cabbage/carrot mixture and cook til lightly browning (9-12 min); add 1 Tbsp water as needed to prevent sticking.

Remove from heat and allow to cool. When cooled, add to chicken mixture and mix it all together really well. It will smell very asian.
Set up your assembly line (the more hands to help, the better)--wontons, chicken mixture, plate with cup of water next to it and then cookie sheet sprinkled with cornstarch--have a small towel nearby as well.
Keep your wontons in the wrapper and covered with a moist papertowel. Take out one, place a tsp to 1.5 tsp of chicken mixture in middle of wonton. dip fingers in water and rub down the edges of the wonton, fold opposite corners together and press to seal (we did ours like the ravioli fold shown on back of wonton wrapper). Set on cookie sheet and cover with towel so it doesn't dry out.
When you're done with all the wrappers and chicken mixture you can do 1 of 2 things:
1. FREEZE the extra ones (we each ate 7-8 and it was enough I think), leave them on the cookie sheet and place it in the freezer til they're frozen then transfer them to a ziplock bag for later! When you're ready, follow the nezt step to cook. (thaw first of course, but not entirely necessary)
2. IF you want to EAT them, heat 2-3 tsp of oil again in your skillet over med-hi, place a single layer of wontons in the skillet and cook 3 min or so (until lightly browning on bottom)--I flipped mine once and cooked them a bit more. Just preference. Then add 1/2 c water, cover and cook til water is gone. Voila. If you have more to cook, wipe out your skillet and repeat. Serve with soy sauce.

Mangoes and Sticky Rice:
1/2 c rice (You're supposed to use high gluten thai sticky rice but it's HARD to find so I sub'd jasmine rice..which I should've soaked for a few hours in water...oh well)
1 c water
1/8 tsp salt
2 tsp brown sugar
1-2 Tbsp coconut milk
(we used a little 4 oz can for this)
1/2 bag frozen mango chunks (or more)-thawed; set aside

1. Soak rice.
2. In a med sauce pan, mix the ingrdients together, bring to light boil, reduce heat to LOW and cover loosely with lid, cook for 15-20 min, stir a few times.
3. When done-remove from heat, COVER tightly with lid and "steam" for 15 min or so.

Sauce:
Remaining can of coconut milk
1-2 Tbsp brown sugar
1/2 tsp vanilla
1 tsp cornstarch
1 Tbsp water
1. Mix water and cornstarch, set aside.
2. In a small sauce pan, over low heat mix coconut milk, sugar and vanilla. Heat through, stirring often; when it begins to thicken slightly add cornstarch mixture and con't stirring til liquid is thickened to runny pudding consistency. (coats the sides of pan or back of spoon). DO NOT LET IT BOIL!

To serve, divide rice among serving dishes. Pour coconut sauce over rice (be as generous as you like--it's so delicious!) and then top with mango. Enjoy it!
I would recommend fresh mango, but they're not reliable and hard to find very often here in the US; so I have found the frozen works quite nicely in its place.

Saturday, September 19, 2009

Pumpkin Bread, Oh Pumpkin Bread

Sorry the picture isn't more fancy, I was going to make a whipped topping for the muffins but they disappeared!
How lovely are your flavors! I love this time of year. It makes me want to wear cute sweaters, cuddle up with senor next to a bonfire, eat soup all day and fix all things pumpkin and apple. I decided to make some pumpkin bread the other day since I had some left over from Lori's bday cake. Problem being?! I thought I had 15 oz left, nope. Only about 9-10 oz. Well dang. I wasn't about to bust it to the store and so I just decided to improvise a recipe for myself based of several of the TONS I found. It turned out PERFECT! Moist, light, very tasty and overall not too unhealthy. (well except maybe those chocolate chips I threw into the muffins!) It ended up making one loaf and 9 muffins.
The main recipe was from Cooking Light, via Mary Ann.
Here's what my final concoction was:
2 c APF (sifted)
2 tsp baking powder
1.5 tsp baking soda
1/2 tsp salt
1.25 tsp cinnamon
1/2 tsp nutmeg
1/4 tsp (generous 1/4 tsp) cloves AND ginger
1 c sugar (I think it was more like 3/4c)
2 whole eggs
1 egg white
1/3c oil (again, scant 1/3 c)
1/3 c buttermilk (I sub'd 1/3 c 1% milk + 1 tsp lemon juice, mix, let it sit for 5 min watch the chemistry unfold!)--you could also use plain yogurt
1/2 c water
1 c pumpkin puree
1-2 Tbsp grated orange zest
1/2 c chopped pecans (optional)
as are: chocolate chips, craisins, walnuts, or FINELY chopped apple

Prepare loaf pan (grease, flour); muffin tins. Preheat oven 350 F.
In one bowl mix flour, bkg powder, bkg soda, salt, nutmeg, cinnamon, ginger, cloves.
In larger bowl with electric mixer on high mix sugar, eggs + white, oil, buttermilk--until well blended.
Add water and pumpkin, mix on low JUST 'til blended. Then gradually add in dry ingredients until just mixed.
Pour about 1.25-1.5 c batter into loaf pan, top with chopped pecans (or stir them in). Bake for approx 45-60 min (until tester comes out clean, mine was about 50 min)
For muffins, same only they baked about 20-25 min I think.
EAT ONE WHILE IT'S WARM...ah, sweet heaven! I rarely just melt at something I bake but I'll let you know, I tore into one of the chocolate chip (semi-sweet by the by) muffins straight from the oven and oh. how. divine.
Optional topping:
you could use a cream cheese frosting, powdered sugar+ milk concoction OR a whipped cream (add a little brown sugar, cinnamon and a dash of vanilla) frosting to top them. It'll make you swoon.

Oh Soup! Tortilla Soup

I posted this recipe before, sans photo. Here's the photo of the goodness I call Chicken Tortilla Soup.
And here's the recipe again for those who missed it before...
Shortcuts I have found useful:
1. use the frozen, chopped green peppers, onions (1c of each is about right)
2. use rotisserie chicken from the deli (I usually don't for $$ purposes, but time-wise it makes this a cinch)
3. All that's left is basically canned stuff. I often use chicken bouillon instead of the canned broth.
If you want to use ground beef that would work as well. Or this works as a veggie meal.
I most often use chicken with skin + bone, boiled, de-skinned, de-boned and chopped up; 2 chicken breasts are just the right amount.

Thursday, September 17, 2009

News FLASH!

I just came across this little gem of a site and it is making me drool all over the keyboard, the recipes seem easy, well illustrated and they offer some really useful ideas/foods. Go check it out!

Tuesday, September 15, 2009

Freezer Meals

Senor helped me prepare some freezer meals for the days ahead when our impending little one decides to make her debut and we are too exhausted to cook. There will be several entries of this nature coming up as I complete the meals. It literally took less than an hour and approx $45 to put these particular ones together and it will be enough for 8-9 nights of dinner. It's nothing impressive or fancy BUT if you are in need of some freezer meal ideas and have a little time (don't worry about space)...they're worth trying. For the chicken meals I placed 2 chicken breasts in each freezer zip-lock bag and then split the mixture b/t the bags so we made 4 dishes and divided them into 8 bags. Did that make sense?!

1. Cranberry Chicken (from Senor's sister)
4 boneless, skinless chicken breasts
1 c french dressing
1 packet of Lipton's dry Onion soup mix
1 can cranberry sauce (whole berry or the regular stuff)
optional: I often add whole frozen cranberries if I can find them
Mix up the dressing, soup mix and sauce. Blend well, stir in a few Tablespoons of water and divide the chicken and mixture b/t 2 freezer bags. When ready to cook, thaw enough to dump into a casserole dish and bake at 350F til done.
Recommended sides: rice, carrots, green beans/brocoli

2. Honey Mustard Apricot Chicken (senor found this on on-line somewhere)
4 boneless/skinless chicken breasts
1 tsp paprika
1/4 tsp black pepper
1/2 tsp curry powder
1/4 c honey
3 Tbsp dijon style mustard
2-3 Tbsp apricot jam
Mix up the ingredients (not the chicken), place 2 breasts in each zip-lock bag, split the honey mixture b/t the 2 bags. Be sure to push all the air out of the bag before sealing. When ready to cook, thaw enough to dump into a casserole dish and bake 350F until done.
Recommended sides: rice and fruit or salad

3. Chicken Adobo (from mi madre)
4 chicken breasts with bone (skin removed)
1 c soy sauce
1 c water
1/2 c vinegar
1/2-1c onion, chopped (I used the pre-chopped frozen stuff)

Mix up the liquids and onion, place 2 chicken breasts in each freezer bag, split the liquid concoction b/t the two bags; when ready to cook thaw enough for liquid to soften, place in a large stock pot, add 2-3 bay leaves and cook on low/simmer til chicken is done.
Serving recommendations: rice, brocoli, carrots, salad, you get the jist

4. Chili (everyone has a recipe for chili I've decided...this is mi madre's)
1 lb ground beef
1-2 c chopped onion (I used the frozen pre-chopped kind)
chili powder/cumin (maybe 1 tbsp chili powder and 1-2 tsp cumin??)
2 large cans Bush's Chili style beans mild sauce (don't drain)
2-3 cans Delmonte stewed mexican/chili style tomatoes (don't drain)
1 can dark kidney beans (rinse, drain and replace with 1/2 can water)
1 can light kidney beans (same thing as dark)
1 can pinto beans (same as kidney beans)

Brown the beef and onions, add chili powder and mix til it looks like taco meat. Season with cumin as desired. Allow it to cool completely. B/t 2 freezer zip-lock bags divide the cans of beans/tomatoes. Then add half beef mixture to each bag. When ready to cook, thaw enough to remove from bag and put in large stock pot, cook on low (probably will take 30+ min) and add ketchup/chili powder/water to taste.
Serving suggestions: tostidos, cheese, sour cream, corn bread

Like I said, nothing fancy, but if you can find the items on sale/bulk and have a little extra time...save yourself some effort down the road one night by having a quick meal on hand! what meals do you like to make for the freezer?

Monday, September 14, 2009

Tirami-su-su-suvia!


We had this church thing on Saturday and they were asking for lots of people to make Tiramisues...I figured of all things I CAN DO THAT! I am capable of baking! The caveat being that it had to meet what we call "word of wisdom" standards. Meaning no espresso or rum (or any alcohol actually, so that kind of rules out most extracts even). Kind of not sounding like Tiramisu huh?! The recommendation was to dip any choice of cookies in milk and layer with whip cream. I was not satisfied with this option either. I set out to find a Tiramisu recipe and make adjusts as needed. I settled on using Pioneer Woman's recipe as the foundation. I didn't want to use mascarpone cheese (that junks expensive!) so I also sub'd that. And finding Lady Fingers was a chore and a half...fortunately I DID find them and did not have to make a sponge cake as substitution. My reflections on the process:
1. I didn't get to taste it so I don't even know if it was edible. (kind of hard to mask a bite from a 9x13 pan!)
2. I am a fan of tiramisu but not this much, I'll be buying mine in the future
3. It's WAY too much work for a dessert. But have your hand at it, it's worth at least one shot.

Recipe (adapted from Pioneer Woman)

Original Recipe:

5 egg yolks

¼ c sugar

½ c marsala **

16 oz mascarpone cheese**

1 c heavy whipping cream

4 Tbsp sugar

1 ½ c strong espresso **

¼ c marsala **

1 Tbsp vanilla

LOTS of lady fingers (if you can find the real-deal lady fingers that are like those seen on pioneer woman’s site, USE them, otherwise go with the little spongy kind I found at Publix—made by Specialty Bakers, they’ll work but they’re not the best)

SUBSTITUTIONS:

· For Marsala: I mixed 1 c pineapple juice, ½-1 tsp almond extract & 1 Tbsp dark molasses together til well combined, then measure out desired amount in place of marsala

· For Mascarpone cheese: 2 8-oz pkgs cream cheese+4 Tbsp sour cream+ 4 Tbsp whipping cream (not whipped) + 1-2 Tbsp butter

· For Espresso: 2 c HOT water + 2 Tbsp either unsweetened cocoa OR nutella spread, mix together until well blended, use desired amt of liquid

Again, I don’t have a clue how it really turned out, but I don’t think these substitutions would likely be terrible; unfortunately, I don’t think they’ll take the place of real tiramisu either. So try your hand at it, or just go buy some at your fav Italian place.


Pumpkin Praline Cake

YUMMY! This was the b-day request from my lovely friend Lori who hauled it all the way from the depths of hades (aka Phoenix, AZ) for birthday dinner, shower power weekend bonanza and her high school reunion! I was excited to try it out and was pleased with the outcome. It was like Autumn heaven in a cake. The cake itself is moist and pretty heavy for a cake. The icing is light and slightly sweet. The praline pieces are what send this one over the insulin-pump-requiring ledge. They are good and actually compliment the cake/icing well without overdoing it. Just don't eat too many pieces of the praline alone or you'll be over and done with before you get to the cake!
I didn't alter the recipe any really, so you can go to Mary Ann's to see the info for that. I'll just give you a nice pictorial summary of how it went...

first layer iced and pralined, second layer...

third layer, final layer!

final touches, voila! The final product...

her reaction...I think it's success!